MichuMod: Implementing Amazonis | Part 2 : Custom Mesh
Planet mesh
After creating the necessary GameObjects for all 91 tiles of the Amazonis board (as explained in Part 1), I noticed there was still an issue.
The underlying planet mesh is designed to work only with size-9 boards (61 tiles). There is a vertex at the center of each tile, the color of which is changed every time an ocean or greenery is placed on the board. The change of vertex color is what signals the shader to “paint this area with the ocean/greenery material” or, more accurately, “reveal the (already existing) ocean/greenery material below this tile”. When a player clicks within a tile slot to place a tile, part of the code searches for the closest vertex on the mesh and changes its color. So when using the same mesh with a 91-tile board, ocean and greenery placement would be offset slighly at best or be totally wrong at worst. This is because there weren’t enough vertices to support the new tiles.
This is easier to explain visually:
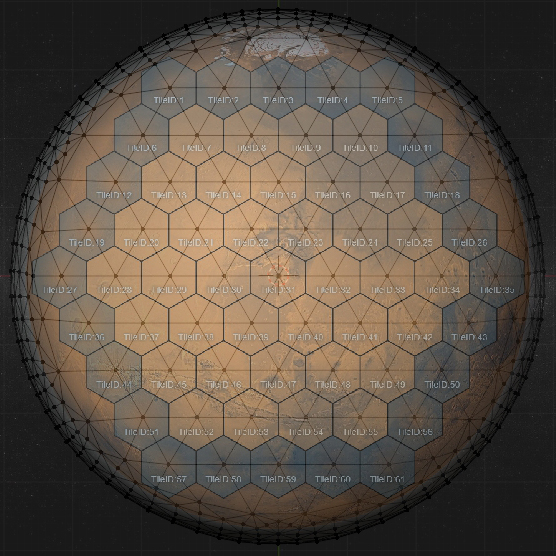 61-tile board on top of the original planet mesh
Searching for solutions
At this point I had 2 options:
- Create a custom planet mesh and keep the vertex color mechanism.
- Create a custom tile mesh for oceans (that originally don’t have one, unlike greeneries) that would be instantiated within the tile itself, inheriting its position and scale, and deactivate the vertex color mechanism completely.
I decided to go with option 1.
Building a custom mesh
I thought that having a way to generate this type of mesh dynamically would be the best solution and the most future-proof one. So if, at some point, I wanted a smaller or even bigger board, I could generate a perfect mesh for it, sparing me time spent on manual 3D modeling.
After a bit of work in Grasshopper (a visual programming tool for Rhino3D), I came up with this definition:
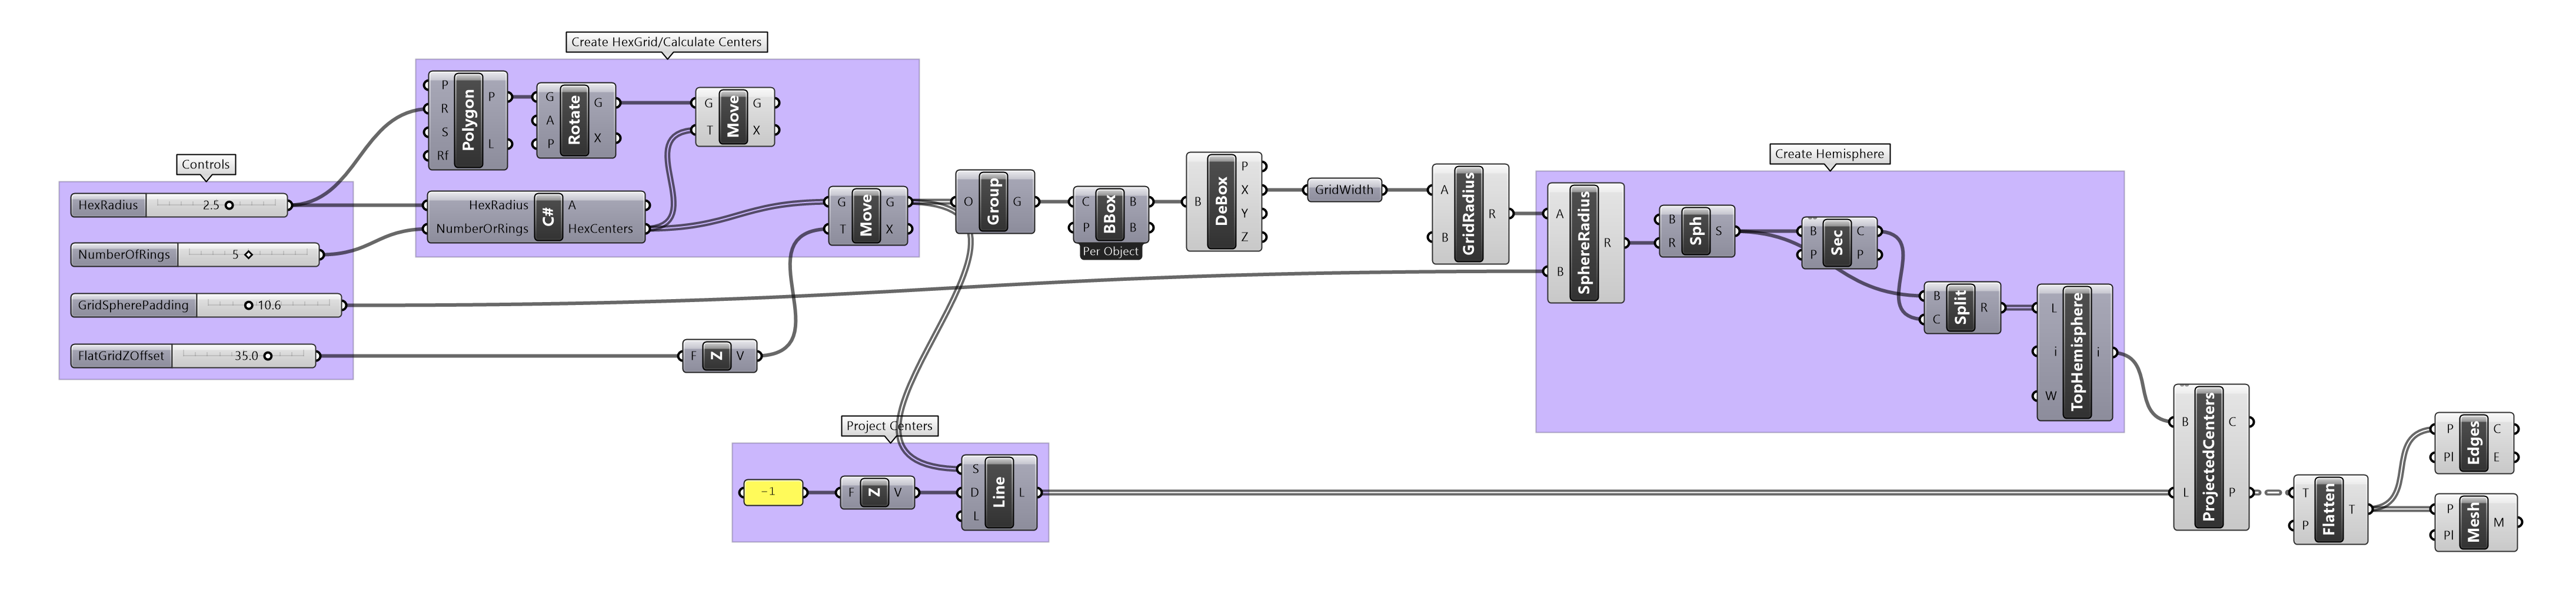 Grasshopper planet mesh definition
 Grasshopper definition in action
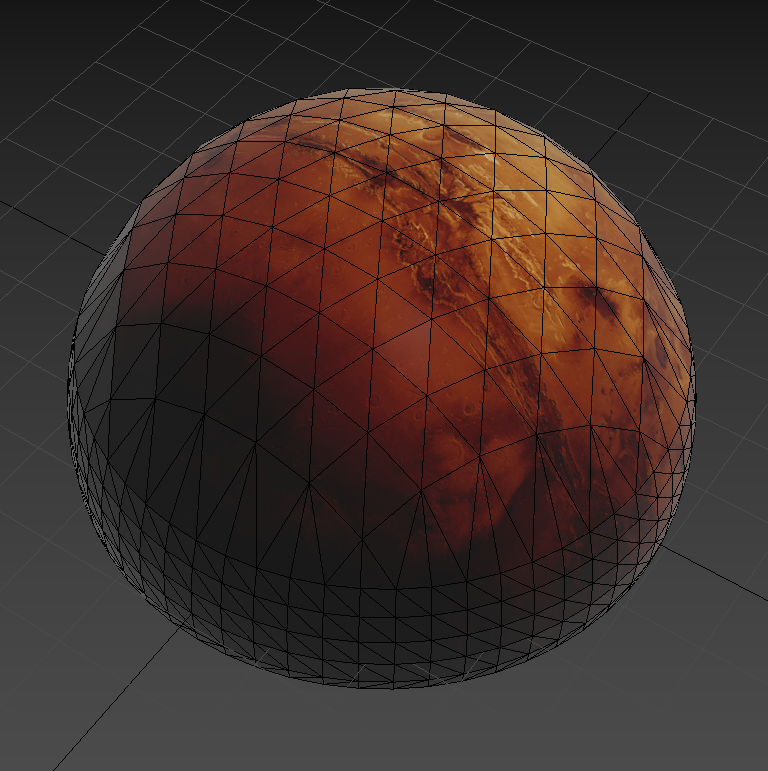
Using it I generated a mesh that supports a 91-tile board (notice how each vertex falls at the center of each tile):
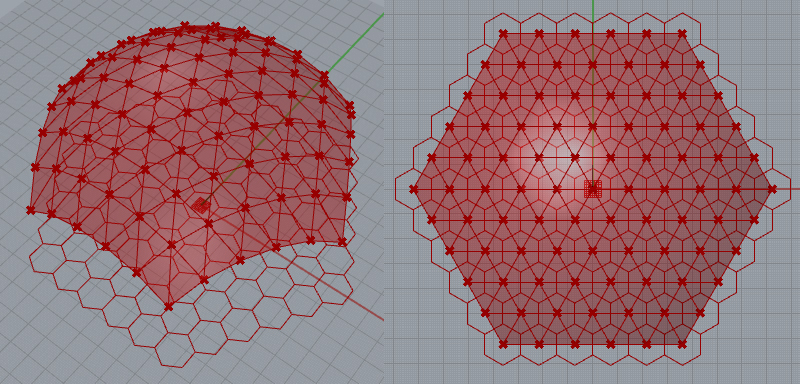 Generated mesh for a 91-tile board
Then I connected the generated mesh to a hemispheric model, referencing the original mesh, and made sure the UVs are correct. The mesh was ready:
 Complete custom mesh for Amazonis
Loading the custom mesh into the game
After a bit of research, I found that an efficient way to load meshes programmatically when using Unity is by using AssetBundles. So I fired the Unity editor up, imported the custom mesh (.FBX format) and built an AssetBundle containing only the mesh data. As long as I had done everything correctly when it comes to sizing and UVs, the game should not have any problem applying the original material on the custom mesh.
The code was straighforward for this one: I wrote a helper function to load the AssetBundle using AssetBundle.LoadFromFile, get the Mesh from it using .LoadAsset<Mesh>(), and return the custom mesh object.
Then, I wrote a [HarmonyPatch] to replace the original mesh only when Amazonis is chosen as the board:
public static bool Prefix(VisualTileController __instance)
{
    bool initialized = (bool)initializedField.GetValue(__instance);
    if (initialized)
        return false;

    if (amazonisMesh == null)
    {
        amazonisMesh = MichuCustomMeshLoader.LoadCustomMesh(assetBundlePath);

        if (amazonisMesh == null)
        {
            MelonLogger.Error($"Failed to load custom Amazonis mesh. Using original mesh instead");
            return true;
        }
    }

    MeshFilter planetMeshFilter = __instance.planetMeshFilter;
    if (planetMeshFilter == null)
    {
        MelonLogger.Error($"planetMeshFilter is null. Cannot apply custom Amazonis mesh.");
        return true;
    }

    // Replace the original mesh with the custom Amazonis mesh.
    planetMeshFilter.mesh = amazonisMesh;

    // Continue with initialization similar to the original method
    planetMeshField.SetValue(__instance, amazonisMesh);
    verticesField.SetValue(__instance, amazonisMesh.vertices);

    Color32[] colors = new Color32[amazonisMesh.vertices.Length];
    for (int i = 0; i < colors.Length; i++)
    {
        colors[i] = new Color32(0, 0, 0, 0);
    }
    colorsField.SetValue(__instance, colors);
    amazonisMesh.colors32 = colors;

    initializedField.SetValue(__instance, true);

    return false;
}
Almost there
Amazonis has other peculiarities as a board, including an extended Oxygen, Temperature, and Venus global meter, as well as 11 ocean tiles to be placed instead of 9. The extended global requirement meters come with new bonuses that I had to implement. This is something that I managed to do some days ago, and which I will be documenting in a future post.
What is still to be done is handle the standard resource/wild bonuses that appear on the board, including cases where Mining Rights/Mining Area is placed on them.